
Kids Mode
This will turn off kids mode. Are you age 13 or older?
Life is Precious Photo Frame
Day Three Craft
on November 26, 2022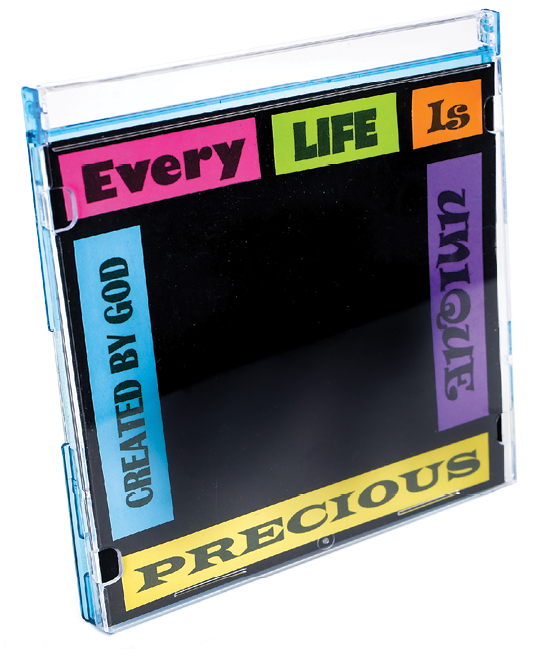
Materials
- Slim (5mm) CD jewel cases, 1 per child
- Black cardstock, one 4¾ x 5-in. piece per child
- “Every” Pattern
- Hot pink cardstock, 1 sheet for every 60 children
- “Life” Pattern
- Lime green cardstock, 1 sheet for every 84 children
- “Is” Pattern
- Bright orange cardstock, 1 sheet for every 120 children
- “Created by God” Pattern
- Bright blue cardstock, 1 sheet for every 36 children
- “Unique” Pattern
- Bright purple cardstock, 1 sheet for every 36 children
- “Precious” Pattern
- Bright yellow cardstock, 1 sheet for every 24 children
- Jumbo paper clips, 1 per child
- Sticky-back craft foam, one 2-in. square per child
Tools and Basic Supplies
- Paper cutter
- Glue sticks
- Scissors
Pre-Prep
- Cut the black cardstock into 4¾ x 5-inch pieces, 1 per child.
- Print the “Every” Pattern onto hot pink cardstock, the “Life” Pattern onto lime green cardstock, the “Is” Pattern onto bright orange cardstock, the “Created by God” Pattern onto bright blue cardstock, the “Unique” Pattern onto bright purple cardstock, and the “Precious” Pattern onto bright yellow cardstock. Cut out the words so that each child has one set.
- Bend open the jumbo paper clips to an angle a little less than 90 degrees, making a V-shape. These modified paper clips will serve as picture stands.
- Cut the sticky-back craft foam into 2-inch squares, 1 per child.
Teaching Tie-In
Show the sample craft and say:
When Jesus lived on earth as a human, he went out of his way to care for the weak, the sick, the orphans, and the widows. He told the little children to come; he talked to a woman from Samaria (which wasn’t done back then); he touched people with incurable diseases; and he gave his life for sinners. Jesus showed how to value others. This is because Jesus made each of those people, and he made each of us, too (John 1:3)! He’s given us great value, not because of anything we can do or how we look, but because it pleased him to do so.
If Jesus considers your life and every person’s life precious, then we should, too. And that should impact how we treat each other. Think about this question: Do I treat people who are different than I am—maybe someone who is old or sick or who lives with disability or who has a different skin shade—with respect and kindness? It’s a good question to think about as we make our Life Is Precious Photo Frame.
Class Time Directions
- With the CD case closed, position it in front of you so that the hinge section is at the top. Then lay the piece of black cardstock on top of the CD case, just below the hinge section. It’s not a perfect square, so it must be positioned to fit the space.
- Lay out the words to the phrase, “Every LIFE Is” across the top of the black square with a little black space above and in between each word.
- Lay the word, “PRECIOUS” across the bottom of the square, with a little black space below it.
- Lay the phrase, “CREATED BY GOD” vertically along the left side of the square and the word, “UNIQUE” vertically along the right side, leaving some black edge showing.
- When you are satisfied with the position of all the words, glue stick them into place. (IMPORTANT: There should be a blank area (approx. 3x3-inches) in the center of the square where the photo of your choice will go.)
- Open the CD case and insert the black cardstock so that the decorated side is facing out and held in place with the 4 tabs.
- Flip the CD case over, then take the V-shaped paper clip and place the smaller side of the “V” against the case, centered and perpendicular to the bottom edge. Then attach it to the case with the 2-inch square of sticky-back craft foam. The photo frame will now stand on its own.
- To complete your photo frame, take it home and place a 3x3-inch photo in the center area.
Tip Corner
- Place a few 3-inch squares on the tables for the kids to use as guides to make sure they reserve a large enough space in the center for a photo.
- If you want to decorate the hinge section at the top of the CD case, draw a long horizontal DNA helix across a 4¾ x ½-inch strip of black cardstock. Then glue stick the strip directly onto the plastic case.
Zoomerang Turtle-y Terrific Science & Crafts
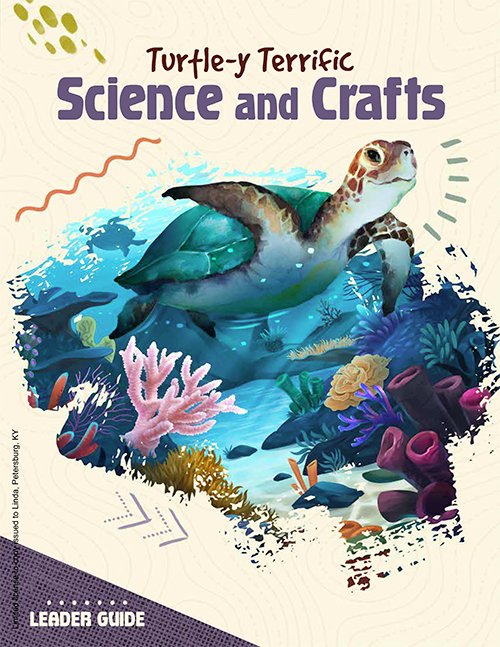
Kids love science experiments and crafts! This guide contains everything you need to coordinate the daily science experiments and crafts for all age groups.
Browse Kids Book- © 2024 Answers in Genesis
- Privacy Policy
- Contact
- About