Kids Mode
This will turn off kids mode. Are you age 13 or older?
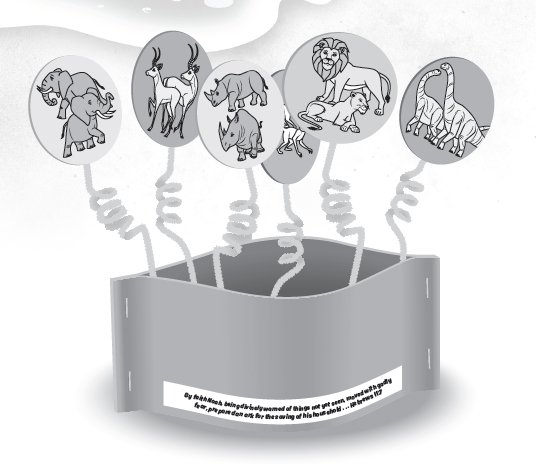
Awesome Ark Hat
on May 23, 2016Materials
- Brown poster board, one 22x28-in. sheet for every 7 children
- Brightly colored chenille stems, 6 per child
- Animal Pairs pattern
- White cardstock, 1 sheet per child
- Awesome Ark Verse pattern
- Tan or yellow cardstock, 1 sheet for every 9 children
Tools and Basic Supplies
- Office paper cutter
- Scissors
- Staplers
- Invisible tape
- Glue sticks
- Crayons

Pre-Prep
- Cut the poster board into 4x22-in. lengths. Then cut the lengths in half so there are two 11-in. pieces per child.
- Staple the pairs together at one end only (2 staples). The other end will be stapled later to fit each child’s head.
- Photocopy the animal pairs pattern onto white cardstock. Then cut out a set of 6 circles per child.
- To give the chenille stems some spring, wrap (coil) the middle of each stem around a crayon 4 or 5 times.
- Photocopy the verse pattern onto tan or yellow cardstock. Then cut out the verse strips, one per child.
Teaching Tie-In
Show the sample craft and say:
Look at these fun hats we get to make and wear today! Let’s look at the animals that go on it. How many are in this circle? (Two.) Right! Did you know God had the animals come to the Ark and get on two by two (seven of some)? There were mostly one boy and one girl of each animal kind. Which animal pair would you like to have seen getting on the Ark? Would you have wanted to get on the Ark, too?
Class Time Directions
- Glue stick the verse strip to one side of the hat.
- Use crayons to color the animal pair circles.
- Tape each circle to one end of a chenille stem.
- Tape the other end of each stem to the inside of the hat—three on one side and three on the other. Be sure to completely cover the ends of the stems as they can be a bit sharp.
- Staple the loose ends of the hat together to fit each child’s head.
Tip Corner
- Make a few larger (4x28-in.) hats for the teachers to wear.
- Add animal stickers to the main part of the hat.
 Download PDF
- © 2024 Answers in Genesis
- Privacy Policy
- Contact
- About
